

Cooking a turkey in a roaster pan can be a game-changer for your holiday feast. This method not only saves space in your oven but also ensures that your turkey cooks evenly and stays juicy. In this guide, we will explore the ins and outs of cooking a turkey in a roaster pan, including preparation, cooking times, and tips for achieving that perfect golden brown skin. Whether you’re a seasoned chef or a first-time turkey cook, you’ll find valuable insights here.
Table of Contents
Introduction to Cooking Turkey in a Roaster Pan
When it comes to preparing a turkey, many people may wonder how they can achieve the best results. Using a roaster pan offers several advantages. First, it allows for better heat circulation, ensuring that the turkey cooks evenly. Moreover, it frees up your oven for other dishes, making it ideal for large gatherings. With a few simple steps, you’ll be well on your way to serving a mouthwatering turkey that will impress your guests.
Importance of Using a Roaster Pan for Turkey
Using a roaster pan is essential for cooking a turkey effectively. Unlike traditional roasting pans, roaster pans are designed with higher sides and a lid, which helps to retain moisture and flavors. This is particularly beneficial for larger turkeys, as it prevents drying out during the cooking process. Furthermore, the size of the pan allows for ample space for vegetables or other sides, enhancing the overall meal.
Benefits of Cooking Turkey in an Electric Roaster
Cooking a turkey in an electric roaster offers unique advantages. For one, electric roasters are energy-efficient, allowing you to save on electricity compared to using a conventional oven. Additionally, they are portable and can be used in various locations, making them perfect for family gatherings or potlucks. Most importantly, they maintain a consistent temperature, which is crucial for cooking your turkey thoroughly and evenly.
Overview of the Cooking Process
Understanding the cooking process is vital for achieving the best results. Generally, the process involves preparing the turkey, seasoning it, and finally cooking it to perfection in the roaster. Throughout this article, we’ll delve deeper into each of these steps, offering practical tips and tricks to ensure your turkey is the highlight of the meal.
Preparing for Cooking a Turkey in a Roaster Pan
Preparation is key to a successful turkey roasting experience. From selecting the right turkey to ensuring it’s properly thawed, each step is crucial for optimal results.
Selecting the Right Turkey Size
Choosing the right size turkey is important for ensuring everyone has enough to eat. A good rule of thumb is to estimate about 1 to 1.5 pounds of turkey per person. This allows for plenty of leftovers, which are always a plus! For example, a 12-pound turkey is typically sufficient for 8-10 people. If you’re unsure, err on the side of caution and go larger.
Thawing Your Turkey Safely
Thawing your turkey correctly is key to preventing foodborne illnesses. The safest method is to thaw it in the refrigerator, allowing approximately 24 hours for every 4-5 pounds of turkey. If you’re short on time, you can also thaw it in cold water, changing the water every 30 minutes until it’s fully thawed. Never thaw a turkey at room temperature, as this can lead to bacteria growth.
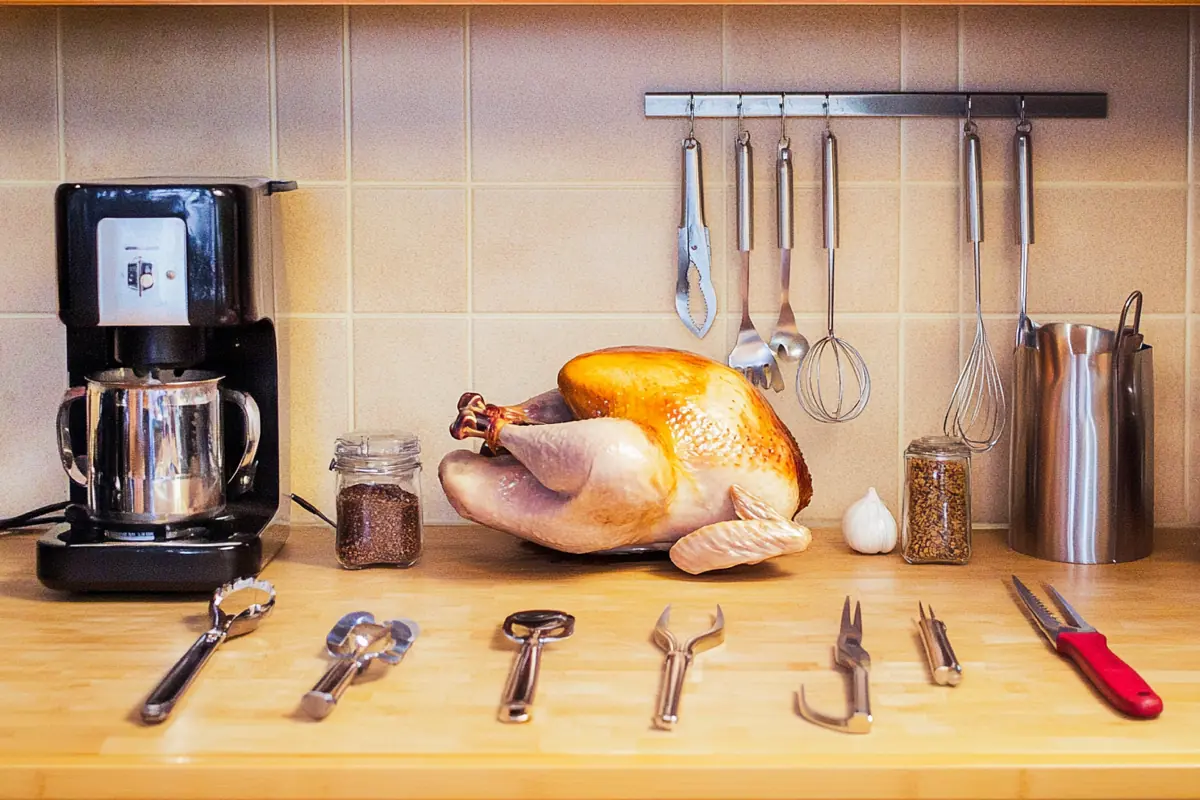
Essential Tools and Ingredients
Before you start cooking, gather all necessary tools and ingredients. Essential items include:
- Roaster pan
- Meat thermometer
- Aluminum foil
- Basting brush
- Seasoning (salt, pepper, herbs, etc.)
Having everything ready will make your cooking experience smoother and more enjoyable. For more details on the tools needed for roasting, you can check out our ultimate guide to pan roasting techniques.
How to Cook a Turkey in an Electric Roaster
Cooking a turkey in an electric roaster is a straightforward process that yields delicious results. With the right techniques, you’ll have a beautifully cooked turkey every time. Below, we’ll outline a step-by-step guide to ensure your turkey turns out perfectly.
Step-by-Step Guide to Cooking a Turkey in a Roaster
Preheat the Electric Roaster: Start by preheating your electric roaster. Set it to 325°F (163°C), which is the ideal temperature for cooking turkey. Preheating ensures that the turkey starts cooking immediately and helps achieve an even roast.
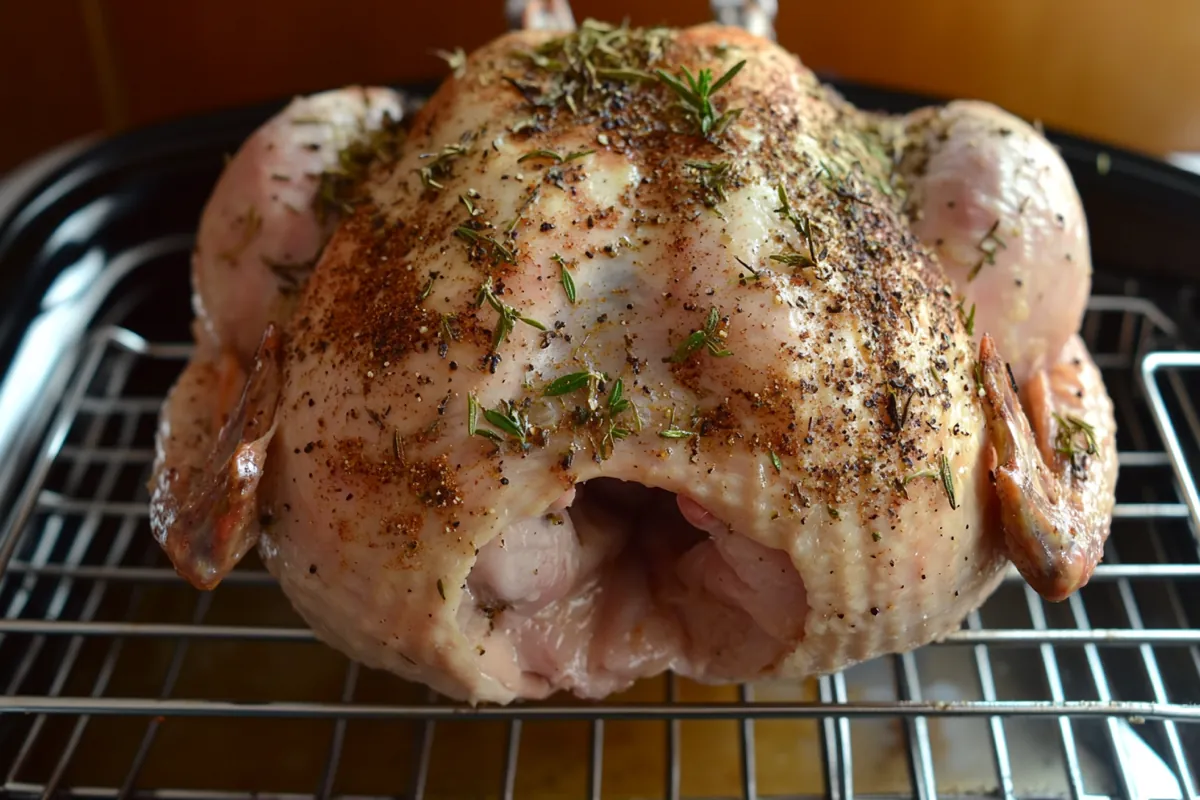
Prepare the Turkey: After thawing, remove the giblets and neck from the turkey cavity. Rinse the turkey under cold water and pat it dry with paper towels. This step helps the skin crisp up during cooking.
Season the Turkey: Generously season the turkey inside and out with salt, pepper, and any additional herbs or spices you prefer. Consider using garlic powder, onion powder, and dried herbs like rosemary or thyme for added flavor.
Place in the Roaster: Place the turkey breast-side up in the roaster pan. If desired, you can stuff the cavity with aromatics like onions, garlic, or fresh herbs. However, remember that stuffing will increase cooking time, which we’ll cover later.
Cover and Cook: Close the lid of the roaster. The lid helps trap moisture and heat, promoting even cooking. Avoid opening the lid during cooking, as this can release steam and increase cooking time.
Basting (Optional): If you want, baste the turkey with its juices every 30-45 minutes. This adds flavor and helps keep the meat moist. However, this step is optional, as electric roasters are designed to retain moisture.
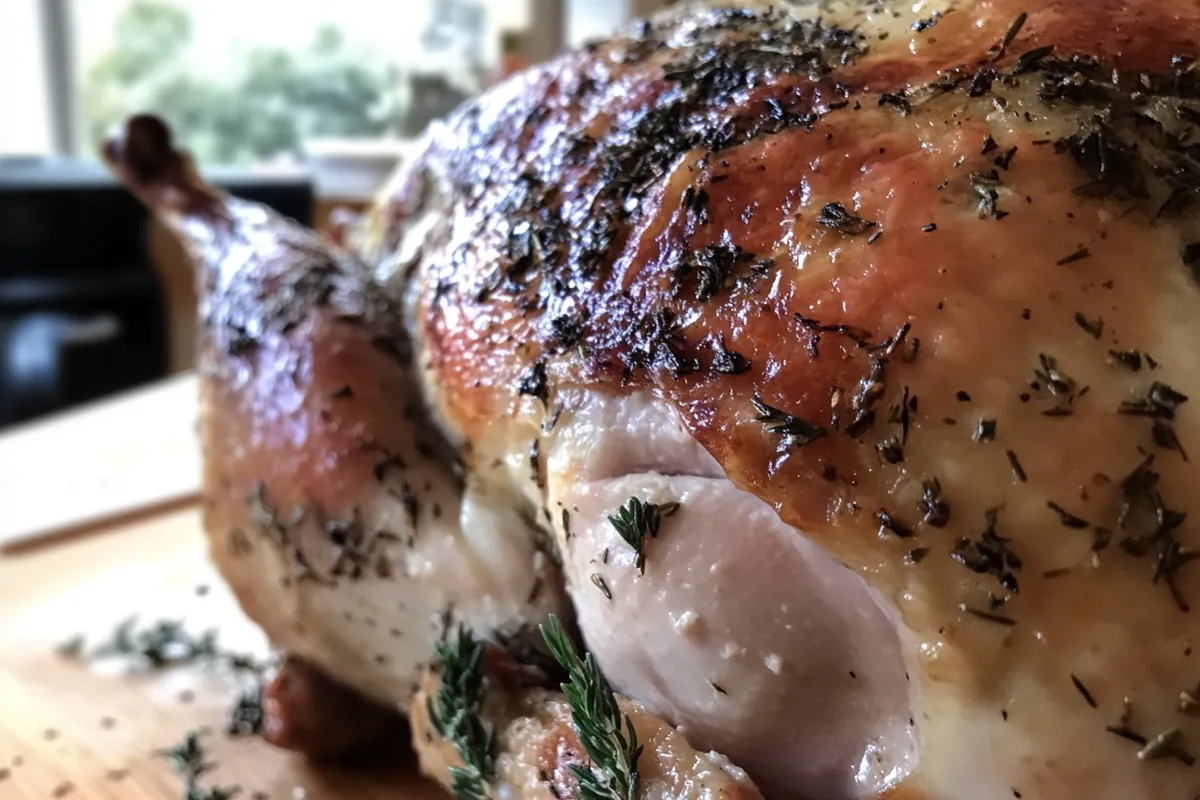
Check for Doneness: Use a meat thermometer to check the internal temperature. The turkey is done when it reaches an internal temperature of 165°F (74°C) in the thickest part of the thigh and breast.
Rest Before Carving: Once cooked, let the turkey rest for at least 20 minutes before carving. This allows the juices to redistribute, resulting in a juicier turkey.
How Long to Cook Turkey in Roaster
Cooking times can vary based on the size of your turkey. Generally, here are some guidelines:
- Unstuffed Turkey: Cook for about 13-15 minutes per pound.
- Stuffed Turkey: Cook for about 15-18 minutes per pound.
For example, a 12-pound unstuffed turkey would take approximately 2.5 to 3 hours to cook. Make sure to refer to the specific cooking times for your turkey weight to ensure perfect results.
General Cooking Times for Unstuffed Turkey
For a quick reference, here are the cooking times for unstuffed turkeys:
- 8-12 pounds: 2.5 to 3 hours
- 12-14 pounds: 3 to 3.75 hours
- 14-18 pounds: 3.75 to 4.25 hours
- 18-20 pounds: 4.25 to 4.75 hours
- 20-24 pounds: 4.75 to 5.25 hours
How Long to Cook Stuffed Turkey in Electric Roaster
If you decide to stuff your turkey, here are the adjusted cooking times:
- 8-12 pounds: 3 to 3.5 hours
- 12-14 pounds: 3.5 to 4 hours
- 14-18 pounds: 4 to 4.5 hours
- 18-20 pounds: 4.5 to 5 hours
- 20-24 pounds: 5 to 5.5 hours
Be sure to check the internal temperature of the stuffing as well, which should also reach 165°F (74°C).
For more insights on the roasting process, consider exploring our article on what is a roasting pan.
Tips for Ensuring a Juicy and Flavorful Turkey
To ensure your turkey is not only cooked but also flavorful and juicy, there are several tips and techniques you can employ. From proper seasoning to checking doneness, each step plays a crucial role in the final outcome of your turkey.
How Do You Keep a Turkey from Drying Out in a Roaster?
Keeping your turkey moist can be a challenge, but with the right strategies, you can achieve a succulent roast every time.
Brining: Consider brining your turkey before cooking. A simple saltwater brine can help the meat retain moisture during the cooking process. Aim to brine for at least 12 hours, but no more than 24 hours to avoid overly salty meat.
Basting: While optional, basting your turkey with its juices can help maintain moisture. Baste every 30-45 minutes, but avoid opening the roaster lid too often to keep the heat trapped inside.
Using Broth or Stock: Adding broth or stock to the bottom of the roaster can create steam, which helps to keep the turkey juicy. You can also use it for basting, adding flavor to the meat.
Basting Techniques for Moisture
If you choose to baste your turkey, here are a few effective techniques:
- Use a baster or a ladle to pour the juices over the turkey.
- Baste from the top down to ensure even distribution.
- If you have added vegetables to the roaster, consider basting with the juices that collect around them for added flavor.
Using Broth or Stock
To enhance the flavor and moisture of your turkey:
- Pour about 1-2 cups of low-sodium chicken or vegetable broth into the bottom of the roaster before placing the turkey inside.
- As the turkey cooks, the broth will create steam, helping to keep the meat moist while adding flavor.
Checking for Doneness
To ensure your turkey is perfectly cooked, you must check its internal temperature.
Safe Internal Temperatures for Turkey
- Breast: 165°F (74°C)
- Thigh: 175°F (79°C)
- Stuffing: 165°F (74°C)
Insert the meat thermometer into the thickest part of the thigh without touching the bone for an accurate reading. This will help guarantee that your turkey is not only safe to eat but also tender and juicy.
Resting the Turkey After Cooking
Resting is an often-overlooked step, but it is vital for juicy meat. After removing the turkey from the roaster:
- Tent it loosely with aluminum foil.
- Let it rest for at least 20-30 minutes before carving.
This allows the juices to redistribute throughout the meat, resulting in a more flavorful and moist turkey.
For additional tips on cooking techniques, consider reading our guide on oven roasting after pan roasting.
Conclusion and Final Thoughts
Cooking a turkey in a roaster pan can be a rewarding experience that yields delicious results. By following the steps outlined in this guide, you can ensure that your turkey is flavorful, juicy, and perfectly cooked. Remember to prepare adequately, monitor the cooking time, and let your turkey rest before carving. These tips will help you master this cooking method, making your holiday gatherings a success.
Recap of Key Points
- Choose the right turkey size and thaw safely.
- Preheat your roaster and season generously.
- Monitor cooking times based on the turkey’s weight.
- Use a meat thermometer for accurate doneness.
- Rest the turkey before carving for optimal juiciness.
Encouragement for First-Time Roaster Users
If you’re new to using a roaster pan, don’t be intimidated! With these tips and techniques, you’ll be well on your way to cooking a beautiful turkey that your family and friends will love. Enjoy the process and embrace the joy of cooking. Your efforts will surely be appreciated at the dinner table!
FAQ
Cooking turkey in a roaster pan can raise several questions, especially for those trying it for the first time. Below are some frequently asked questions to help clarify common concerns and enhance your cooking experience.
Do I Put Water in the Bottom of a Roaster for Turkey?
It’s not necessary to put water in the bottom of a roaster when cooking a turkey. However, adding broth or stock can enhance flavor and moisture. The steam generated from the liquid helps keep the turkey juicy. If you prefer, you can add vegetables to the bottom of the pan, which will also provide moisture while imparting additional flavors.
Is it Better to Cook Turkey in a Roaster Oven or Regular Oven?
Both methods have their benefits. Cooking in an electric roaster frees up your main oven for other dishes, making it ideal for large gatherings. Conversely, a regular oven provides more cooking space and flexibility with temperature settings. Ultimately, the choice depends on your kitchen setup and personal preference. For consistent results, many home cooks prefer electric roasters for turkey.
How Long Should You Cook a Turkey in a Roaster?
The cooking time for a turkey in a roaster depends on its size. As a general guideline, you should cook an unstuffed turkey for about 13-15 minutes per pound. For a stuffed turkey, allow about 15-18 minutes per pound. Always use a meat thermometer to check for the safe internal temperatures discussed earlier, ensuring the turkey is cooked thoroughly.
Additional Tips for Cooking Turkey in a Roaster
– Avoid opening the lid: This releases heat and moisture, which can lengthen cooking time and dry out the turkey.
– Use a meat thermometer: This is essential for checking doneness accurately.
– Consider brining: Brining the turkey beforehand can greatly enhance its flavor and moisture.
– Let it rest: Allow the turkey to rest for 20-30 minutes after cooking to ensure juiciness.


